How to Choose the Best Biology Dissection Kit?

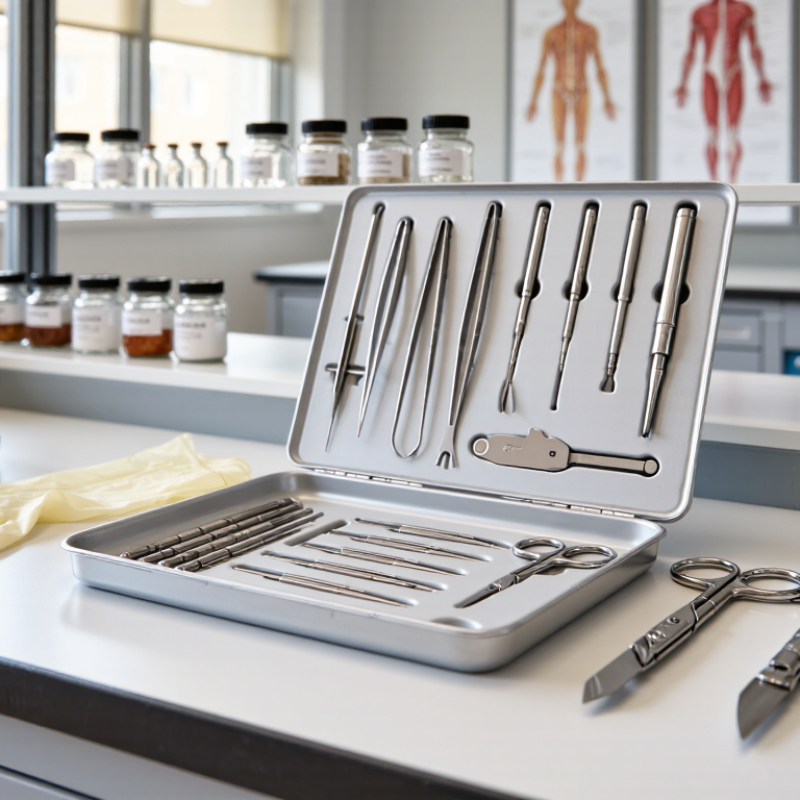
Choosing the right Biology Dissection Kit can shape every practical lesson, from a careful first incision to a confident anatomical observation. In a classroom, the difference often appears in small details: forceps that grip without crushing tissue, scissors that open smoothly, and a tray that keeps instruments organized. A reliable kit should support accurate work, not create unnecessary frustration.

Experience matters here. Teachers and laboratory technicians often evaluate balance, corrosion resistance, cleaning requirements, and student handling before recommending equipment. Stainless-steel instruments may offer durability, but material quality can vary between suppliers. Product descriptions alone are not enough. Check instrument dimensions, included tools, replacement options, and clear care instructions. The kit should also match the learner’s age, course level, and approved laboratory procedures.

Safety remains central. Protective eyewear, gloves, secure storage, and direct supervision should accompany any practical activity. A sharp instrument is not automatically a professional instrument. It must be appropriate, controlled, and maintained. Reputable educational suppliers usually provide traceable product information and transparent safety guidance.

My first instinct was to choose the largest kit. That assumption was incomplete. More tools can mean more confusion, especially for beginners. A compact Biology Dissection Kit may serve a school laboratory better when each instrument has a clear purpose. Still, no single kit fits every classroom. Comparing expert recommendations, institutional requirements, user feedback, and hands-on needs leads to a more dependable decision. The best choice is not merely impressive in a catalog; it should feel stable, practical, and trustworthy under real laboratory conditions.
How to Choose the Best Biology Dissection Kit?

Define the Purpose and Users of the Biology Dissection Kit

How to Choose the Best Biology Dissection Kit?

Define the Purpose and Users of the Biology Dissection Kit

A dissection kit should match its learning purpose, not simply contain the most tools. A secondary classroom may need blunt probes, forceps, scissors, and a safe cutting surface. A university laboratory may require finer instruments and more precise handling. In my teaching experience, beginners often struggle with tool control before studying anatomy. Simple, well-balanced instruments can reduce frustration and protect specimens from careless damage.

Identify the users before comparing kits. Young students need durable tools, clear instructions, and close teacher supervision. Experienced learners may need specialized instruments for detailed observation. Check the kit’s material quality, cleaning requirements, storage case, and safety guidance. Reliable equipment should have smooth handles, secure joints, and corrosion-resistant surfaces. Certification and supplier documentation can also support responsible purchasing. However, documentation alone is not enough. Test the grip and movement whenever possible.

Tips: Write down the lesson objective first. Then list the users’ ages, skill levels, and class size. Choose only the tools that support those needs. A larger kit can create confusion and increase unused items. Review the kit after each practical session. Some assumptions may be wrong, especially when students have different hand sizes or learning needs. Adjust the selection gradually.
Compare Specimen Types, Tools, and Included Materials

How to Choose the Best Biology Dissection Kit?

A useful dissection kit should match the specimen, lesson goal, and learner’s experience. Compare specimen types carefully. Preserved fish, frogs, and organ samples offer different anatomical views, textures, and handling demands. A 2021 study in Anatomical Sciences Education reported that structured practical activities can improve students’ spatial understanding, but preparation quality remains important. A specimen that is too small may frustrate beginners. One that is overly complex can distract from the lesson.

Inspect the tools next. A basic kit should include blunt and sharp dissection scissors, forceps, a probe, a scalpel, pins, a tray, and protective equipment. Check whether handles feel secure and whether tips align correctly. The 2019 National Assessment of Educational Progress found that only 36% of U.S. fourth-grade students reached the proficient level in science. Clear tools and guided materials cannot solve every learning gap, but they can reduce avoidable confusion. I have found that labeled diagrams, specimen identification guides, and cleanup instructions often matter as much as the instruments.

Included materials deserve close attention. Look for gloves, absorbent sheets, sealed storage, waste guidance, and age-appropriate instructions. The kit should explain preservation chemicals and ventilation requirements in plain language. Some product comparisons ignore durability. That is a mistake. A bent probe or leaking container can interrupt a lesson immediately. Review the supplier’s safety documentation, educational alignment, and specimen sourcing information before purchase.

Evaluate Safety, Quality, and Ease of Use

How to Choose the Best Biology Dissection Kit?

Evaluate Safety, Quality, and Ease of Use

Safety should guide every decision. Look for rounded tool edges, secure grips, and protective storage. Scissors should open smoothly without sudden resistance. Forceps need firm tips, not sharp misaligned points. Eye protection and disposable gloves should fit comfortably. A poorly fitting glove can distract students during delicate work. Clear cleaning instructions also matter. Some kits include tools that appear safe but lack useful guidance.

Quality becomes obvious through small details. Stainless steel instruments should resist rust and feel balanced in the hand. Hinges must move evenly, without grinding or loosening. Handles should have visible markings or distinct shapes for quick identification. A sturdy case prevents blades from shifting during storage. Check whether the kit includes a tray, labels, and replacement guidance. Very cheap materials may save money initially, but repeated replacement becomes frustrating.

Ease of use affects learning. Choose a kit with simple instructions and tools suited to the learner’s age and skill level. In supervised practice, beginners often confuse similar instruments. Color coding can help, although it may fade over time. I would not judge quality by appearance alone. A polished surface can hide weak joints or uncomfortable handles. Test the kit before classroom use, if possible. Hold each tool for several minutes. Small discomfort becomes significant during careful observation. Reflection matters here: the most complete kit is not always the most practical one.

Check Compatibility with Lessons, Age Groups, and Skill Levels

How to Choose the Best Biology Dissection Kit?

A good biology dissection kit should fit the lesson before it impresses the buyer. A frog anatomy unit needs different tools from a flower, leaf, or fish study. Check the worksheet, specimen size, and required techniques before ordering. Small scissors may suit delicate plant tissue but frustrate students handling thicker materials. In practical teaching, tool mismatch can quickly turn an active lesson into a waiting exercise. That issue is easy to overlook.

Age matters as much as curriculum. Younger learners usually need rounded tools, clear instructions, and fewer sharp components. Older students may benefit from finer forceps, probes, and measuring equipment. However, age labels can mislead. A confident ten-year-old and a nervous sixteen-year-old may require different support. Teachers should review grip strength, reading ability, classroom maturity, and supervision needs. Try one kit early. It reveals awkward handles and confusing steps.

Skill level should guide complexity, not just the number of tools. Beginners need labeled parts, visual guidance, and simple procedures that build control. Experienced learners can use less familiar instruments and record observations independently. Look for durable construction, clean storage, and instructions that explain safe handling. A crowded case is not automatically better. I once valued variety over usability, and several tools remained untouched. That mistake made the kit look professional while limiting actual learning. Ask whether each item supports a stated learning goal, then adjust the selection after classroom feedback.

How to Choose the Best Biology Dissection Kit? - Check Compatibility with Lessons, Age Groups, and Skill Levels
Kit Type Recommended Age / Level Best-Matched Lessons Typical Specimens or Materials Required Skills Essential Tools Safety and Supervision Compatibility Check
Basic Observation Kit Ages 8–11; upper primary or introductory learners External anatomy, life cycles, habitats, and simple classification Leaves, flowers, insects, fish scales, prepared slides, and non-preserved biological samples Observation, labeling, measuring, drawing, and recording evidence Hand lens, blunt probe, forceps, ruler, tray, and disposable gloves Adult or teacher supervision; handwashing; no sharp blades or chemical preservatives Confirm that the kit supports observation-based lessons rather than internal dissection activities
Guided Invertebrate Dissection Kit Ages 11–14; lower secondary or beginner practical classes Invertebrate structure, segmentation, adaptation, and organ functions Earthworms, mussels, crayfish, or other specimens permitted by local school policy Following a dissection guide, identifying external structures, and making biological sketches Dissection tray, scissors, forceps, blunt probe, pins, gloves, and eye protection Teacher demonstration recommended; use preserved specimens according to safety instructions and local regulations Check that specimen size, guide detail, and tool sharpness match the learners' hand skills
Plant Anatomy Kit Ages 11–16; lower to upper secondary Flower structure, pollination, seed formation, roots, stems, and transport tissues Fresh flowers, seeds, fruits, stems, roots, celery, and prepared plant slides Using a hand lens or microscope, dissecting floral parts, and producing labeled diagrams Scalpel or craft knife for teacher use, forceps, dissecting needle, hand lens, slides, and coverslips Low biological hazard when using fresh plant material; supervise cutting tools and check for allergies Make sure the kit includes materials that directly support the plant units in the lesson plan
Frog or Fish Anatomy Kit Ages 14–18; upper secondary biology Vertebrate anatomy, organ systems, adaptation, and comparative biology Preserved frog or fish specimens, anatomical diagrams, and optional digital alternatives Locating organs, making careful incisions, comparing structures, and interpreting functions Dissection tray, scalpel, scissors, forceps, blunt probe, pins, gloves, apron, and goggles Strong teacher supervision; ventilation; chemical handling procedures; follow ethical and institutional rules Verify that the specimen type and internal structures correspond to the curriculum outcomes
Mammalian Anatomy Kit Ages 15–18; advanced secondary or pre-university Mammalian organ systems, respiration, circulation, digestion, and comparative anatomy Sheep heart, pig heart, lungs, kidneys, or other legally sourced preserved organs Three-dimensional anatomical orientation, precise cutting, data recording, and evidence-based comparison Scalpel, dissecting scissors, forceps, probe, tray, absorbent pads, gloves, apron, and eye protection Experienced supervision required; manage preservatives, sharps, biological waste, and ventilation carefully Check whether the kit provides enough specimens and tools for pairs or small groups
Microscopy and Microanatomy Kit Ages 13–18; secondary and introductory college laboratory work Cells, tissues, mitosis, epithelial structure, plant transport, and histology Prepared slides, onion epidermis, cheek cells, pond-water samples, and plant sections Slide preparation, focusing, magnification calculation, staining awareness, and microscopy drawing Compound microscope, slides, coverslips, droppers, stains where permitted, forceps, and lens paper Use appropriate eye and chemical safety procedures; disinfect reusable equipment and avoid unknown cultures Confirm microscope compatibility, objective magnifications, slide type, and availability of power supplies
Comparative Anatomy Kit Ages 16–19; advanced secondary or foundation-level study Evolution, homologous structures, adaptation, vertebrate comparison, and phylogeny Paired specimens, bones, organs, models, prepared slides, and comparative anatomy diagrams Independent planning, anatomical identification, measurement, comparison, and scientific reporting Complete dissection set, calipers or ruler, microscope, specimen trays, reference charts, and PPE Advanced supervision; formal risk assessment; strict sharps, preservative, and waste procedures Choose a kit that offers multiple structures or species suitable for direct comparison
Digital or Model-Based Dissection Kit Ages 10–18; mixed-ability, remote, or restricted laboratory settings Organ-system review, pre-lab preparation, anatomy vocabulary, and alternative practical learning 3D models, printed anatomy cards, interactive diagrams, videos, or virtual specimens Visual interpretation, sequencing, terminology use, and applying structure-function relationships Tablet or computer, printed worksheets, 3D model pieces, and optional anatomical replicas Minimal biological risk; check screen accessibility, data privacy, and safe handling of model parts Ensure the digital content covers the same structures, vocabulary, and assessment objectives as the lesson

Compare Costs, Storage Needs, and Long-Term Value

Choosing a biology dissection kit requires more than comparing the checkout price. The National Center for Education Statistics reports that U.S. public schools spent $14,347 per pupil in 2020–21. That figure shows why laboratory purchases need careful planning. A $180 kit used 30 times costs $6 per session before replacement parts, cleaning supplies, and teacher preparation. Cheap kits can become expensive when tools rust or specimens arrive damaged.

Measure storage before ordering. A case measuring 60 by 40 by 15 centimeters needs a dry, secure shelf, not a crowded drawer. Check whether instruments have fixed compartments. Loose scissors and probes disappear quickly. I also inspect seal quality, labeling, and whether components can be cleaned without cracking. Small details matter. In practice, storage failures often reduce usable life faster than normal classroom wear.

Long-term value should include lesson flexibility. Can one kit support several age groups, repeated observations, and independent student work? The OECD PISA 2022 report recorded a science score of 499 for the United States, compared with an OECD average of 485. This does not prove that dissection improves achievement. It does show why hands-on resources should serve clear learning goals. I have sometimes overvalued the number of included tools. A smaller, durable set may create better lessons, although that judgment should be tested against actual class size, replacement rates, and storage conditions.

LSP App

Download the LSP App now

Scan QR code to download the app

We use cookies to personalize content, utilize website traffic analytics & support our marketing initiatives. By continuing to browse our site you consent to receive our cookies. For more information see our Privacy Statement. 
Ok